Since so many of us are on the subject of camp crafts, I thought I would do a DIY on one of my favorites! (I made them mini, but you can do them with whatever size sticks you have!)

What you will need:

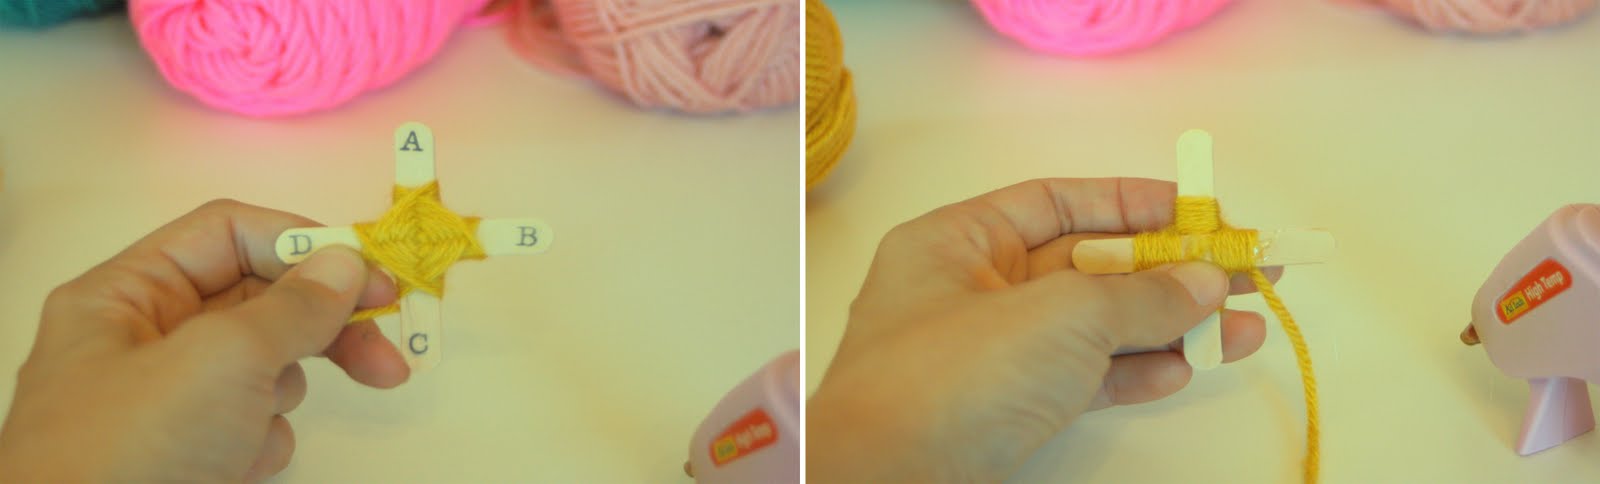
Start by hot gluing 2 craft sticks together in an x shape. Place a dot of glue in the center, on the backside of the x, and secure end of yarn, as shown. Then flip it to the front side.

For tutorial purposes I have put letters on the front-end of the sticks, which you may choose to do if you want to practice first (just know that these letters will show on the final project). Now, bring the yarn to the front through A & B, and down in between C & D.
Then, bring the yarn up through D & A, and down between B & C. Continue wrapping yarn around the back of B, then the back of A.

You have now made a complete round! Keep wrapping in this pattern, making sure that each round is pushed toward center, until you want to change colors. On backside, secure end of yarn with a dot of glue and trim excess.
To begin next color, simply glue the new yarn on the backside of A, flip over to front, and begin wrapping in the pattern as previously stated. Fasten off again with a dab of glue and trim end.
Continue with as many colors as you wish until you are satisfied with your piece.

PS--since this is my first DIY, let me know what you think :)
No comments:
Post a Comment